7.3. TPU Computing Power
7.3.1. BM1684 Performance test
In this section, we have listed the calculation data of the BM1684 TPU. In addition, we have attached the test commands for each performance test, which you can verify according to the test commands in the table.
注解
Currently, the new version SophonSDK does not support BM1684 TPU computing power test. You can use BMNNSDK 2.7.0 or SOPHONSDK 3.0.0 to test (FP32/INT8 test only).
If you are using BMNNSDK 2.7.0, you need to enter the docker environment and source the environment variables.
If you use SOPHONSDK 3.0.0, you need to put this file http://219.142.246.77:65000/sharing/1IVcX1dgx as SOPHONSDK 3.0.0 bin directory, and enter docker environment and source environment variables.
TPU calculation performance test |
||
Chip |
Model |
The test_perf directive |
1684 |
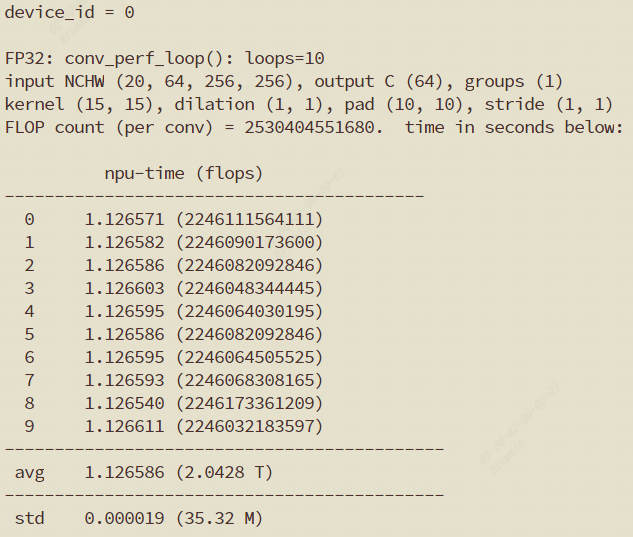
FP32 |
Enter the docker environment, source environment variable, and run the command: 1test_perf 0 fp32 conv 10 20 64 256 256 64 15 15 10 10 1 1
|
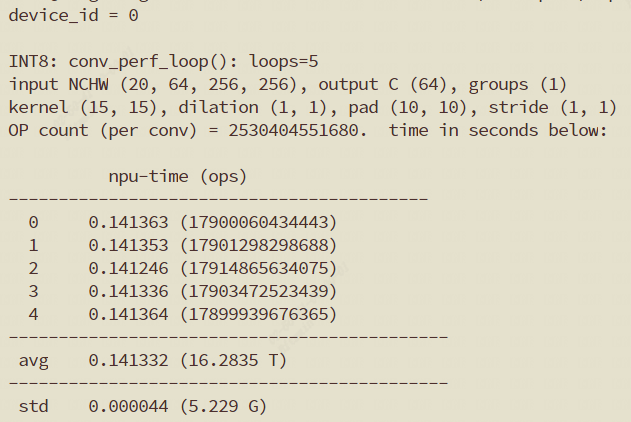
INT 8 |
Enter the docker environment, source environment variable, and run the command: 1int8 conv 5 20 64 256 256 64 15 15 10 10 1 1
|
|
7.3.2. BM1684X Performance test
In this section, we have listed the computing power data of the BM1684X TPU. In addition, we have attached the test commands for each performance test, which you can verify by following the test commands in the table.
注解
You can test it in the new version of SophonSDK. Since the test script relies on LIBSOPHON and the driver environment, you will need to refer to the Installing SDK section to install LIBSOPHON first.
The test environment construction process is as follows:
 1#Go to tpu-kernel_<date>_<hash> in SophonSDK
 2#Decompress tpu-kernel_v<VERSION>_<COMMIT>_<DATE>.tar.gz and go to the decompressed directory
 3
 4source scripts/envsetup.sh
 5
 6# After environment initialization is complete, a '(pcie)' prompt is displayed on the far left of the command line prompt in pcie mode by default.
 7(pcie)my/current/work/path $
 8
 9# Enter the sample directory
10cd samples
11mkdir build && cd build
12cmake ../
13make firmware
14make load
15
16# After loading successfully, you can use the dmesg command and the following output will appear
17#...
18[ 14.505087] bmdrv: bmsophon0 firmware init done!, status = 0x6125438
19[ 14.505168] bmdrv: firmware load success!
20#...
21
22# Compile the host's application
23make -j
TPU calculation performance test |
|||
Chip |
Operation | Model | test_perf directive |
||
1684X |
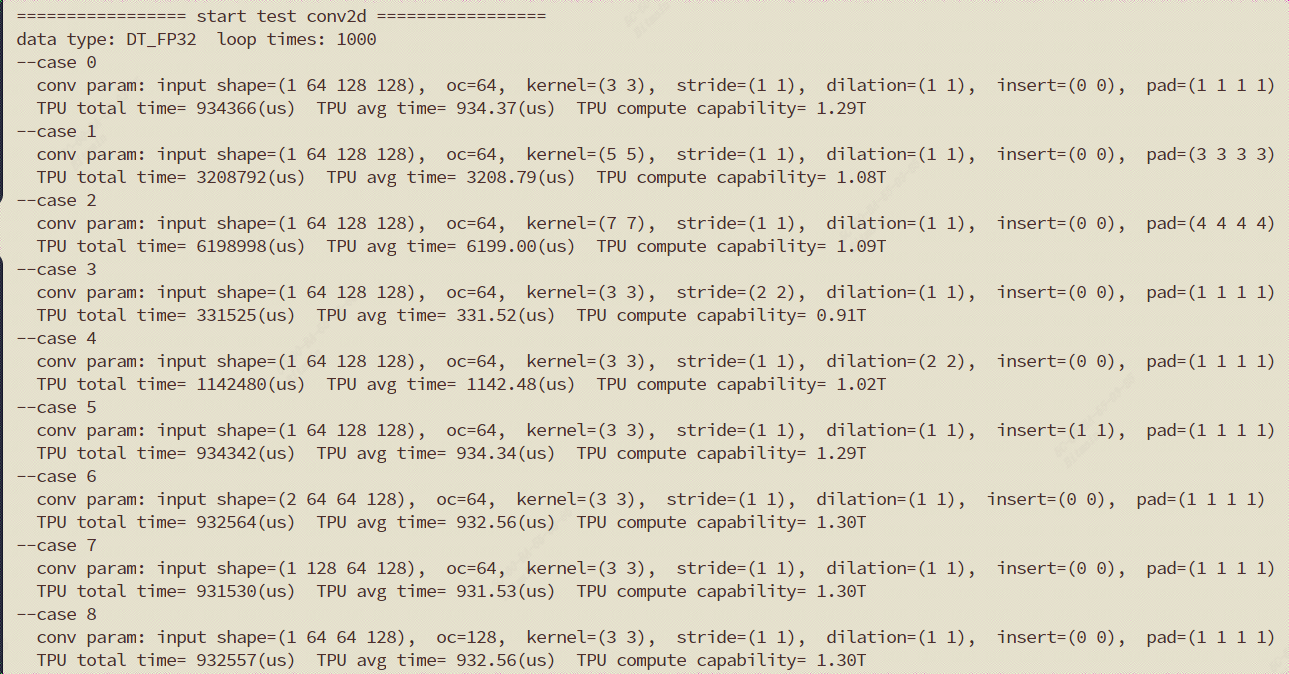
CONV |
FP32 |
Execute the command: 1./tpu_test_instrutions INS_CONV DT_FP32
|
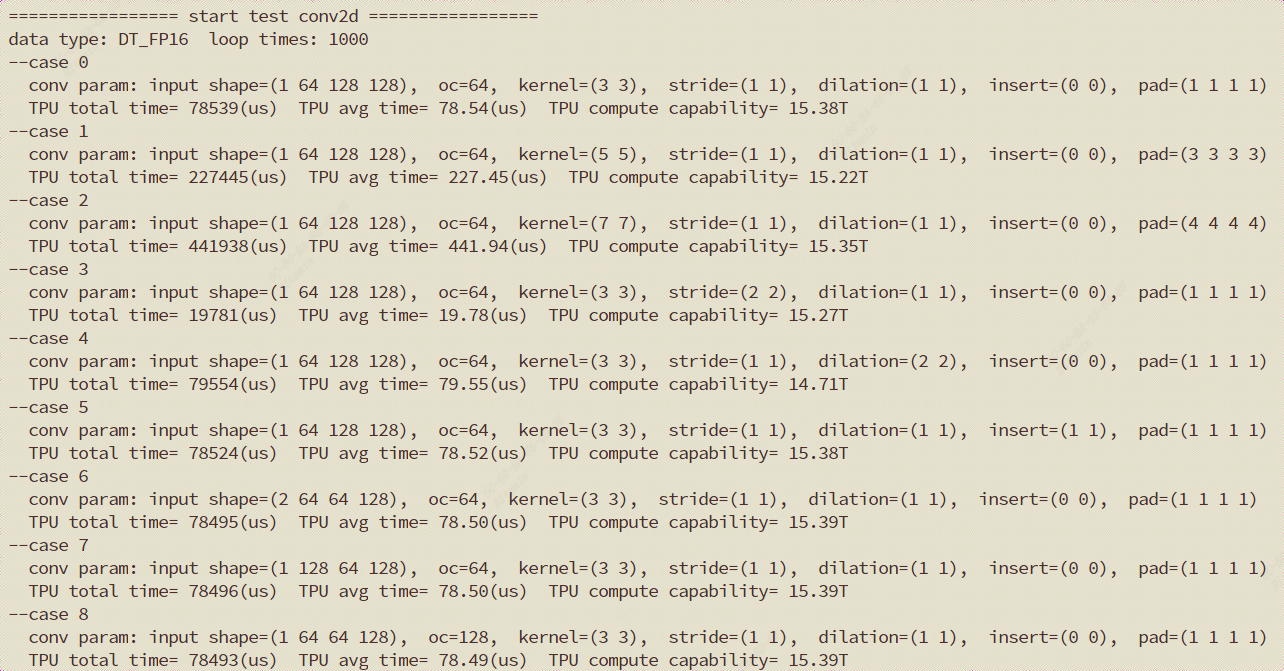
FP16 |
Execute the command: 1./tpu_test_instrutions INS_CONV DT_FP16
|
||
INT8 |
Execute the command: 1./tpu_test_instrutions INS_CONV DT_INT8
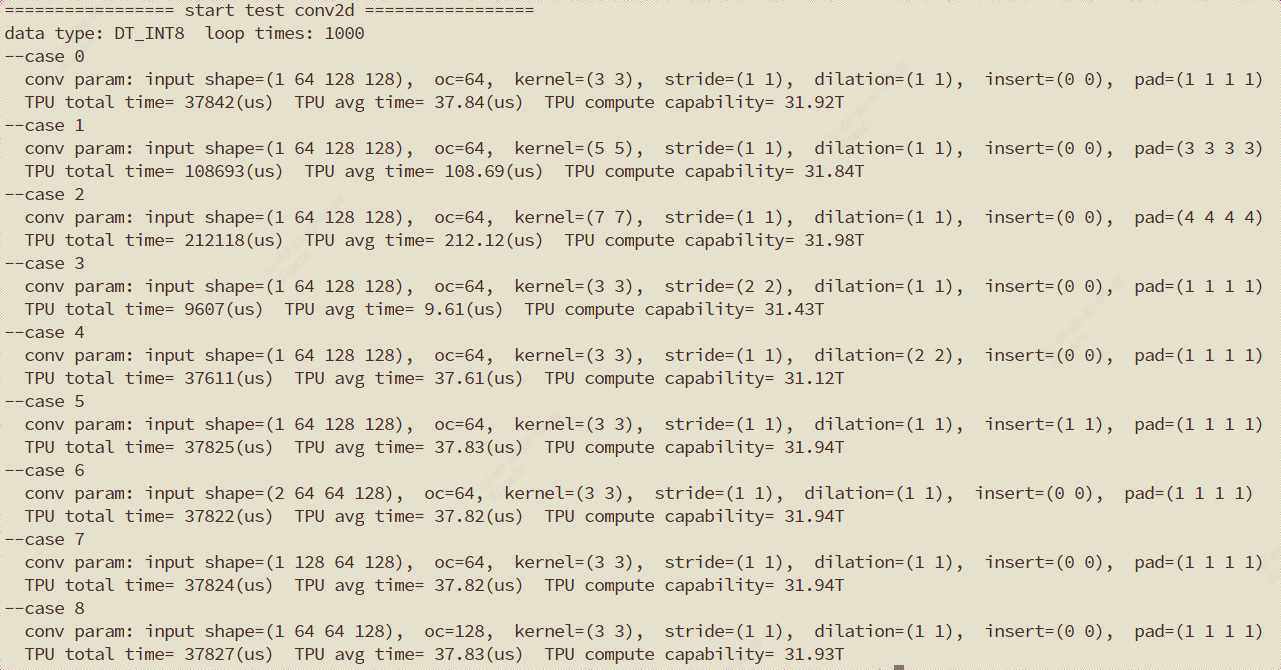
|
||
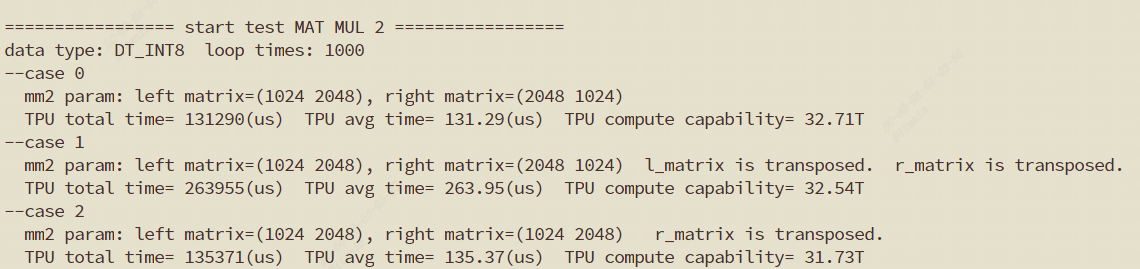
MAT MUL 2 |
FP16 |
Execute the command: 1./tpu_test_instrutions INS_MAT_MUL2 DT_FP16

|
|
INT8 |
Execute the command: 1./tpu_test_instrutions INS_MAT_MUL2 DT_INT8
|
||